
How to Hold Your Violin Bow
So, you’ve got yourself a fiddle. You’ve got the fancy case, you’ve got the rosin and shoulder rest, maybe you’ve even got a name for your instrument (Mine is called Belle, but not after the Disney princess I promise…)
Hopefully, you’ve already had a chance to watch the first few videos on JamWithLauren and by now you’re a pro at holding the instrument - which, I’ll have you know, is no small feat!
(By the way, if you haven’t had a chance to visit the website or sign up yet, check it out for some awesome playing tutorials, video lessons, blog posts, and a super cool fiddle community!)
Playing the fiddle (or viola, for that matter,) requires us to use our bodies in ways that initially may feel uncomfortable - counter-intuitive, even. ‘Chin instruments’ like the violin and viola are oriented towards the left side of our body, extending out from the neck like a bizarre 3rd arm, around which our two real arms must move with poise and coordination. Not gonna lie, this type of positioning, when done incorrectly, can cause some real physical problems, often resulting in pain and potential injury.
(If you’re new to playing and want to avoid this, or maybe you’re an experienced player currently having difficulty with your playing position, check back soon for another post with ideas for how to avoid injury and optimize your playing).
Not only must we have a good set-up and strong posture to support the instrument, but there’s also the matter of holding the bow. THIS is where things get a bit more complicated. Here, I’ll walk you through step-by-step how to hold the bow, common problems you may face, and what to do if you get frustrated! (Also, pretty pictures included for visual reference!)
Using JWL module 1, lesson 1, as a reference, I also wanted to give you another medium in which you can practice the holds. The two types of bow holds, commonly referred to as ‘professional’ and ‘beginner’, are different from each other in only one small way - the placement of your thumb. It doesn’t really matter what you call them, neither one is ‘better’ than the other, they’re just different styles - although one is slightly easier to learn as a new player. Here’s a step by step for the ‘beginner’ hold:
Step 1:
Hold your RIGHT hand out in front of you, allowing your wrist, hand, and fingers to be limp and relaxed. Maybe give it a little shake, just to be sure.

Step 2:
Allow your middle and ring finger to move together inward towards your palm, where they’ll gently meet your thumb so that the three digits are loosely touching on the fingertips. (Make sure your index and pinky fingers are staying independent of this process! They should both be pointing slightly forward, making your hand look like bunny ears - or a ‘happy llama’ shape).


Step 3:
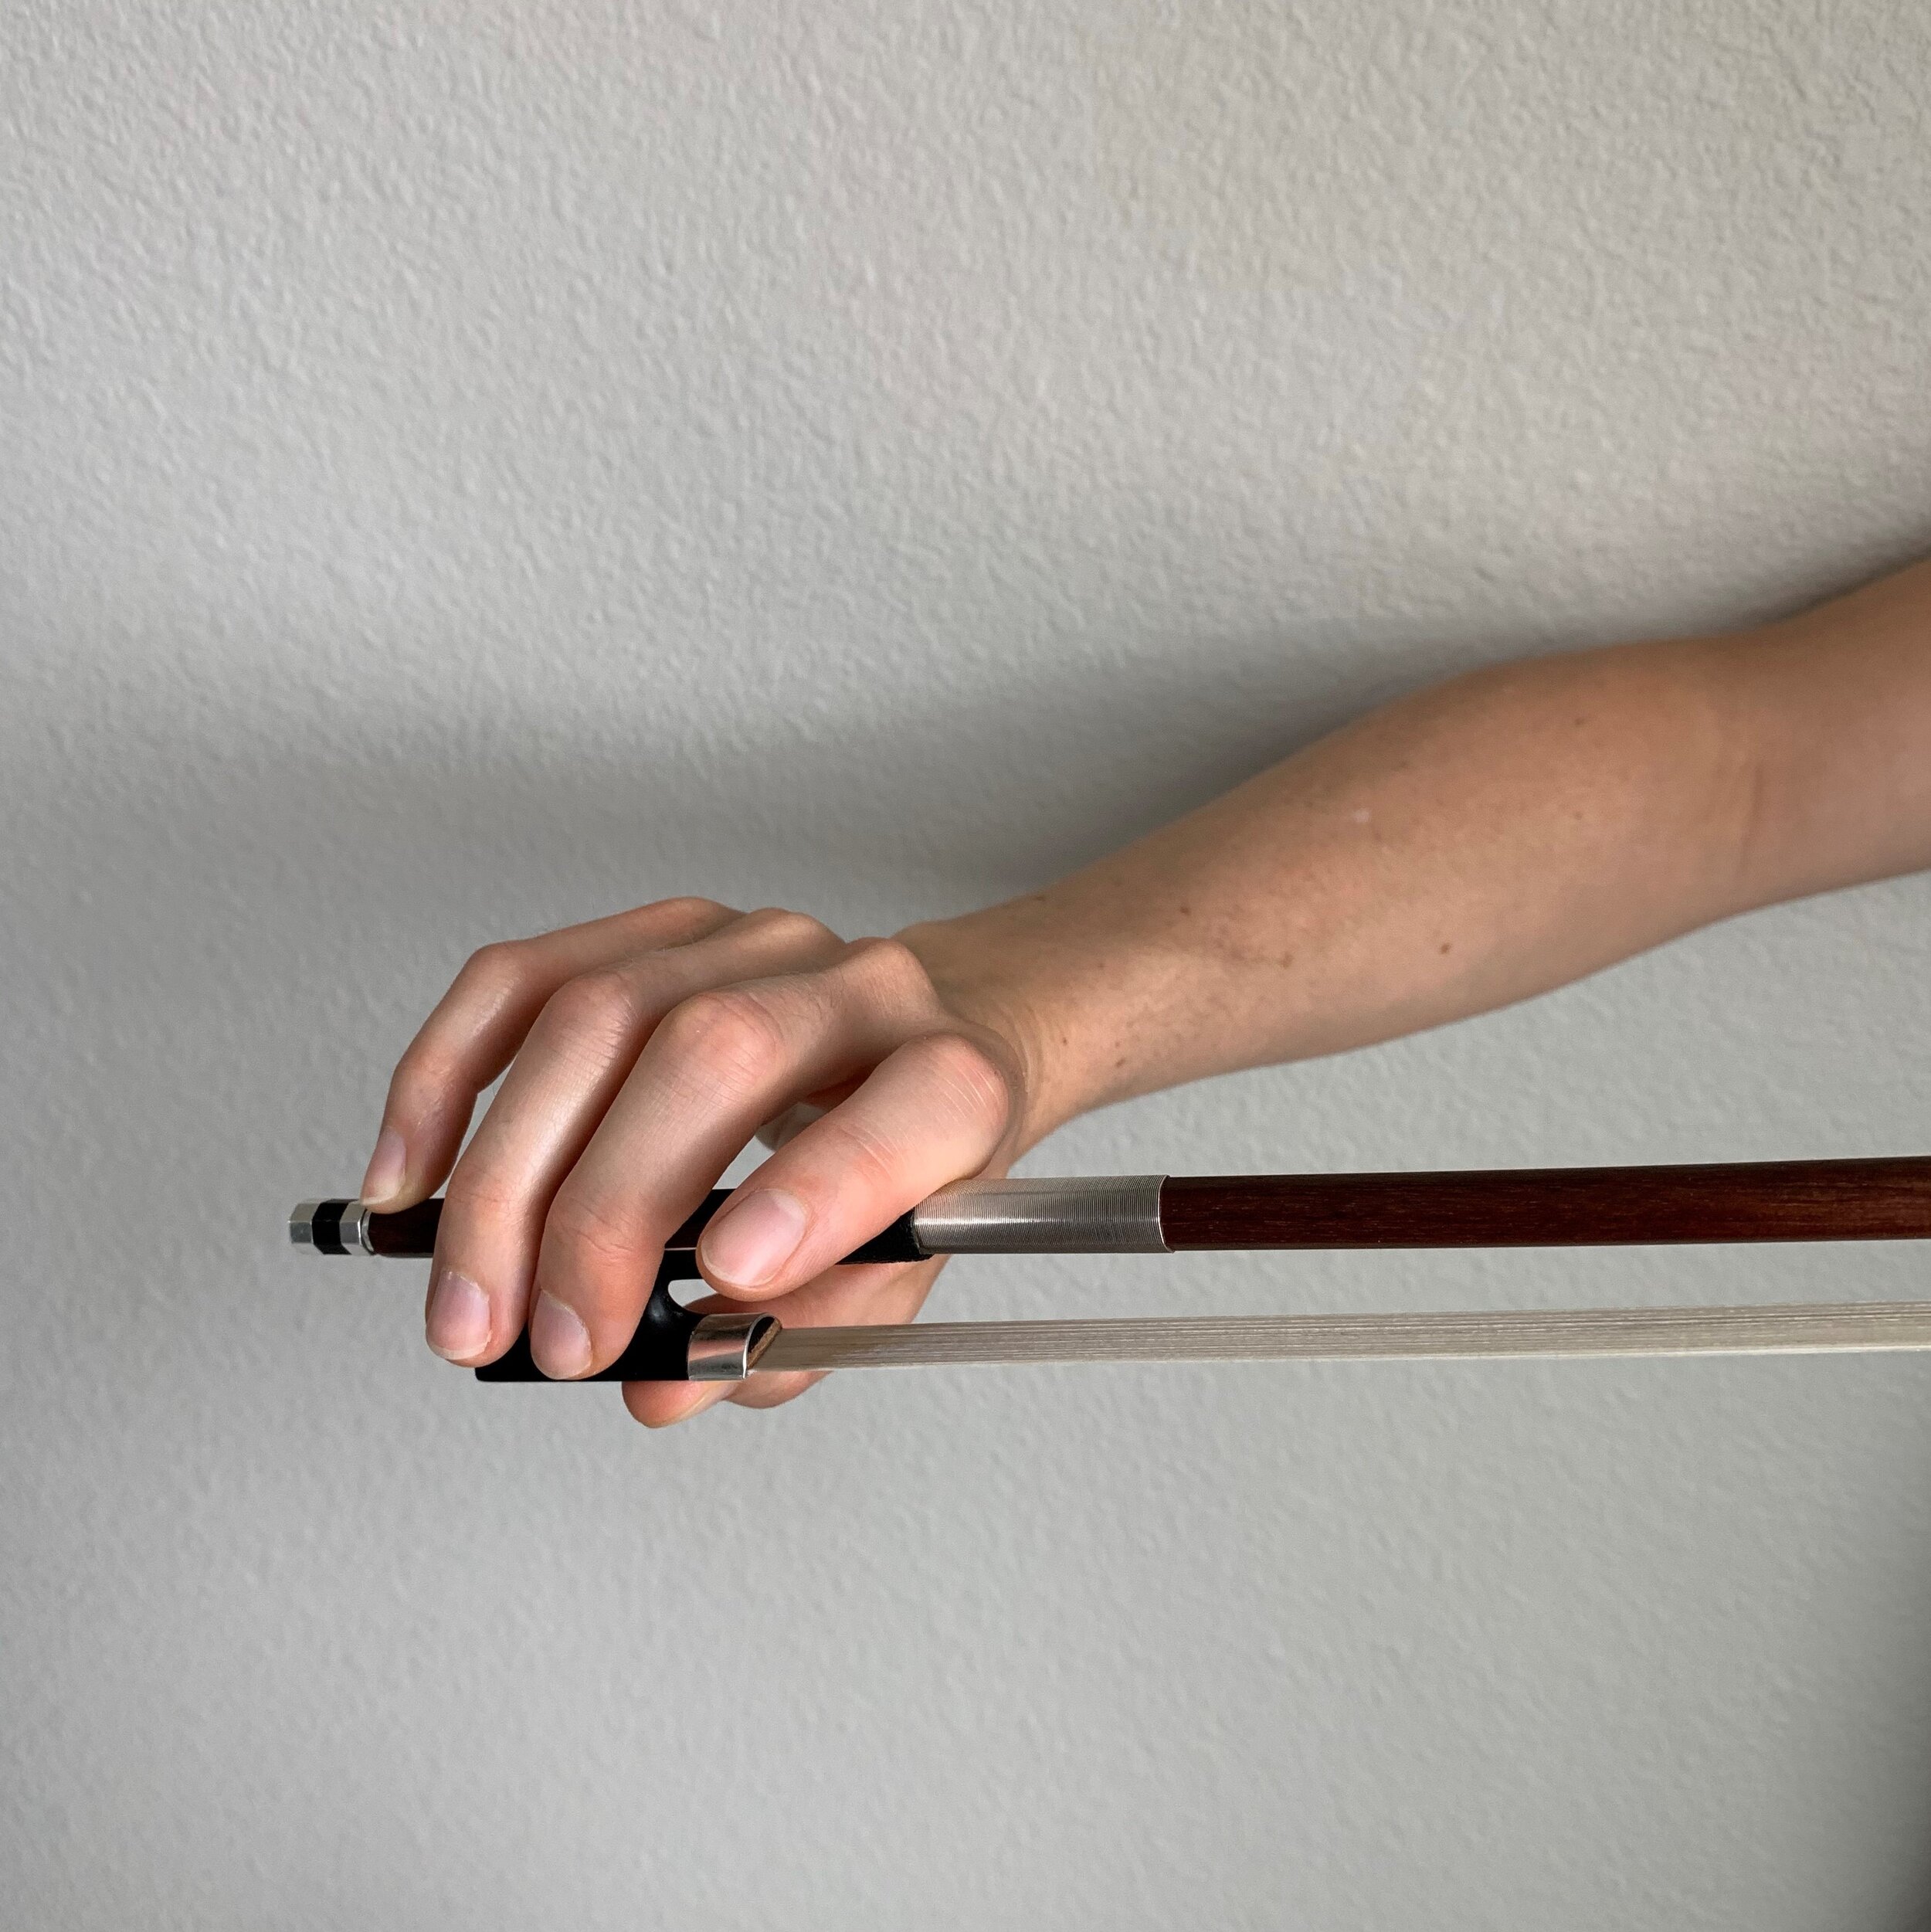
While your left-hand holds the bow stick at about the half-way mark, allow your right two middle fingers and thumb to separate just enough to accommodate the frog (yes, it’s really called the frog. No, I don’t know why). Your thumb should be holding the frog from the metallic underside, while the two fingers reach around the top of the frog to the side that faces away from you. Now, the stick should be gently resting between your thumb and two middle fingers.

Step 4:
Once you’ve got this basic holding shape, your index finger can relax down onto the stick, making contact somewhere between your second and third knuckle. (This is where you get your power - more weight from your index finger onto the stick, more contact your bow will have with the string, making a louder and more abrasive sound. Less pressure allows for more quiet, floaty sound).
Step 5:
Now, you can relax your pinky onto the stick, landing somewhere near where the bow screw sits. Depending on the size and shape of your hand, it may want to fall on the screw - which is fine, although not ideal. Experiment with the orientation of your entire hand on the bow stick, and maybe shift it upwards (very small adjustments!) towards the tip.

Your pinky acts as the springboard, or shock-absorber, for your bow. This means that it’s super important to keep your pinky curved and flexible, in order to avoid bumps or shakes. If your pinky is straight and in a locked position, it will make it very difficult to keep your bow straight on the strings, and may also prevent you from using your bow arm efficiently. Also, some players experience a collapsing of their pinky’s third knuckle joint, especially those who may be hypermobile. (This is pictured below). With time and patience, you can train your pinky to stay curved without collapsing in on itself - if this is a problem for you, make sure you always pay close attention to your pinky’s position, to avoid pain or injury to the knuckle joint.


Perfecting the angle of your pinky is where most people get tripped up - so if you’re having trouble, don’t despair! There are some great exercises on JamWithLauren, like ‘pinky push-ups’, ‘windshield wipers’, and ‘pinky taps’. These are all designed to help you strengthen your hand and get accustomed to the bow hold - check out the videos on the website!
****I used to walk around holding a pencil like a violin bow - it’s a great way to practice your bow hold even when you don’t have your instrument!****
As for a professional bow hold, all you need to change is your thumb; Instead of resting on the metal piece connected to the bow hair, bump it up a step so that it’s resting on the underside of the stick, in between horsehair and stick.


This may feel unstable, and many students balk at the change. But give it a chance! Although your hand shape changes, this style of hold enables a lot of flexibility and versatility for your hand.
In all honesty, either one of these holds gets the job done - although one is referred to as the ‘beginner’ hold and one the ‘professional’ hold, it’s ultimately up to the preference of the player.
Alrighty then - there’s your bow hold crash course! Some important take-aways:
•Maintain a relaxed hand, palm, and fingers.
•Keep a flat-ish and flexible wrist, in relation to the rest of your arm.
•Curved pinky!
Happy Practicing!!
-CB