
How to Improve Violin Tone and Bow Control: Recipes for Mixing Pressure, Placement, and Speed
In goal-oriented conversations with my students, the focus on improved tone is frequent- regardless of age or development. With young learners, it’s usually mentioned by me. I demonstrate or point out examples of tone, whether it’s consistent or variable, devoid of emotion or full of vibrancy. Adult learners often ask how to obtain a ‘sweeter’ or ‘less-scratchy’ tone. A sound that connects their love of the instrument with the precious practice time they’ve carved out of their busy lives. A tone to fill them with inspiration and encouragement.
Tonal work is deep and a huge physical/emotional investment in your playing. It’s worth it. Enjoying the sound you create with your hands and your heart might be the most motivating factor towards continuing to play this devil’s box.
Before We Begin…
This post is going to be chock-full of cooking references. If this makes you hungry, I apologize. Here’s a link for my favorite cookies as an olive branch.
Let’s dig in, shall we?
The Recipe List
Tone Creation on bowed string instruments is a recipe with three ingredients:
Placement,
Pressure (more accurately Weight)
Speed.
As we draw the bow across the strings in various rhythms and phrases, skilled players are constantly adjusting these three components to find the perfect blend. Adding more weight might require using less speed. Or vice versa, increasing the speed could be necessary to balance your additional weight. If you intensify your weight and speed, is your bow at a place on your string that it (the string) can provide enough resistance? If the bow is too close to the fingerboard, the added weight and speed could be a big bummer. Like your banana bread turned out burnt and hard on the outside but raw in the middle. (This happens to me every time I use a loaf pan. What is my problem?? I digress).
We’ll begin by isolating each ingredient, but before we go further into the mechanics of your arm, let’s check in on your hand. How you hold your bow contributes a tremendous amount to your flexibility, endurance, expression and you guessed it, tone! There’s a whole other post on that. Here it is:
Okay on with it.
The First Ingredient is Pressure.
Pressure refers to the amount of arm/hand/bow weight that’s applied to your string. Sometimes people equate the word pressure with something negative, tight, or stressful. So even though most of the string ed world uses ‘pressure’ when discussing this ingredient, I’ve been changing it up a bit and just saying ‘weight’ instead.
The ideal situation is that you harness the power of gravity and use the weight of your bow arm as an advantage. To do this, recognize that the fiddle holds up the bow - not your arm. Your arm guides and directs the bow, but if the fiddle wasn’t there, your bow would fall to the ground. Just as your thumb acts as a fulcrum for your bow hold, your fiddle is the fulcrum for the bow itself. Give the weight of your arm to your fiddle. When you feel like your arm and hand have sunk into the string and you are completely relaxed, take a breath and when you exhale, allow gravity to pull the bow in a downstroke. Let the fiddle hold the bow for the entire length of the stick, even at the tip. Keep the weight in the string while you push the bow back towards the frog.
Have you ever been a little bored as a passenger on a long road trip and stuck your arm out the window, experimenting with how much resistance your hand needs to give the wind for your arm to feel balanced? And then you dip your hand and feel the wind rush over and under your skin? Playing with that resistance is kind of similar to playing with weight in your bow.
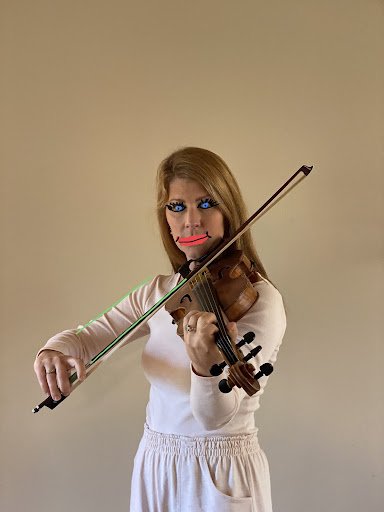
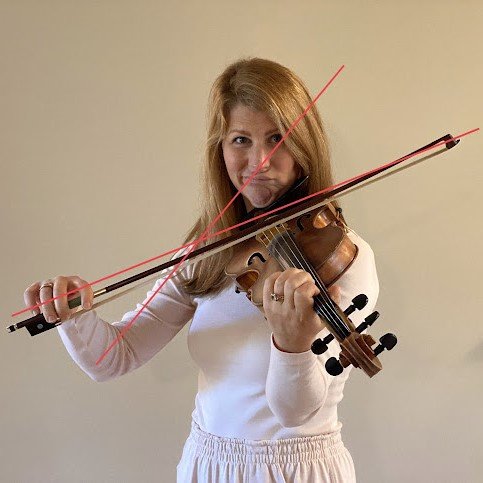
A challenging aspect of this ingredient is keeping your bow arm height at the correct string level while giving the weight of your arm to the fiddle. It can be easy to mistake a relaxed and weighted bow with a droopy arm. Here are some pictures and videos demonstrating what I’m talking about.


This video was made for a different post, but is relevant in this context as well.
Alright moving on.
The Second Ingredient is: Placement
Placement refers to the location your bow hair and string connect as you play. Where your bow lands in proximity to the fingerboard or the bridge affects the clarity and color of your tone.
If your bow is placed over or very near your fingerboard, you’ll produce a fuzzier sound. You’ll also notice that you have a harder time playing a single string cleanly. Conversely, you’ll notice that you have an easier time playing double (or even triple) stops! There isn’t as much projection from your instrument in terms of volume. If your bow is placed very near your bridge, you’ll have a wiry sound. You’ll notice you have plenty of room for string crossings and your bow has more resistance pushing against it rather than the spongy feeling you found closer to the fingerboard. This resistance can also contribute to greater volume.
And then, of course, you have all the places in between! So the big question begs to be asked. Where to be? Well, you’ll need to find the sweet spot, which is often referred to as ‘the sounding point’. The sounding point tends to be just off of the center, with your bow favoring the bridge side a bit. The sounding point allows you to achieve a warm yet clear and clean tone. You’ll have just enough sizzle to your sound for easy projection.
Excellent! Once you find the sounding point, you should be good, right? Hopefully. The tricky bit is that you need to be able to KEEP your bow consistently at the sounding point (or the fingerboard, or the bridge, or whatever placement you’ve decided upon for the desired effect at the moment) despite concentrating on string crossings and rhythms and bowings (oh, and whatever your left hand is doing!).
Check your placement:
Take a little video of you playing something that you know well but haven’t been super happy about your tone. Watch the playback and notice if your bow *accidentally* drifts within a stroke. I put asterisks around accidentally because sometimes players do this on purpose, to alter their tone mid-stroke. You’ll be able to do that too one day, if you don’t already. But if the tip of your bow drifted toward the fingerboard on your down bows, or the frog of your bow went toward the fingerboard on your up bows and you didn’t mean it, aka your bow stroke wasn’t straight, then we should work on it with the exercises below. Why? Because a goal with ‘good tone’ or rather, being in control of your tone, requires you to be purposeful with all three ingredients as you adjust each one for your recipe.
Let’s break down placement with this exercise of segmenting your bow.
Placement Exercise Part 1:
Segment: Middle to Tip
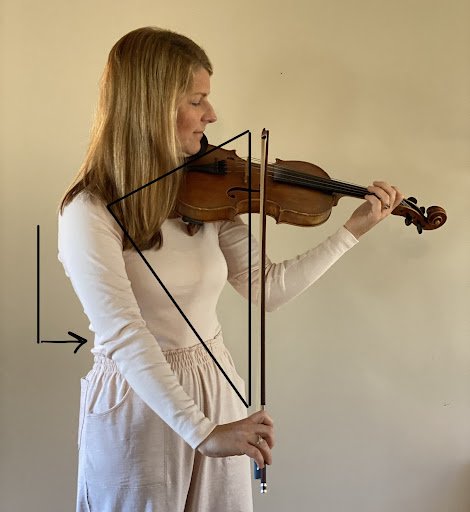
Start with your bow on the sounding point at the middle of the bow. Feel your bow, arm, and back create an imaginary box or rectangle shape. Like this:

As you pull your bow down, watch your bow placement where it connects to the string to maintain a straight line (not always possible if you use progressive lenses). Notice that to keep the bow parallel to the bridge, you’ll have to push your bow hand almost out in front of you, which will shift the rectangle shape to a triangular shape.
Segment: Tip to Middle
For the next stroke, your up bow will begin at the tip and stop in the middle. Pull your elbow back to ‘starting’ position so you return to your rectangle. Feel your wrist start to lift, almost as if you are a marionette.


Segment: Middle to Frog
Continuing the up stroke, this time moving from the middle to the frog, let your wrist pull the bow towards your nose. You’re creating two smaller triangles here. It’s also nice to enjoy how much of your bow is above your instrument. I like to imagine my bow is a fishing pole and that I’ve dropped a nice sinking hook into the water.


Segment: Frog to Middle
Pull from your elbow again to return your bow back to ‘starting position’ with your down stroke. Feel your wrist follow.


Practice each of the four segments, stopping your bow and feeling your shapes and elbow and wrist between each segment.
It might be helpful to add that this all just kind of naturally happens if you’re keeping your eye on the sounding point for the entire duration of your stroke. But sometimes muscle memory of your current bowing habits take over and you move your arm in a way that this doesn’t happen. So breaking down the actions can sometimes be useful. I didn’t learn about this stuff until maybe my 15th year of playing and it made a massive difference in my tone.
Placement Exercise Part 2:
Combine the first two segments. Play from the middle to the tip and then the tip to the middle without stopping your bow between the segments. Practice just middle to tip and back over and over, keeping your bow completely parallel to the bridge.
Combine the last two segments. Play from the middle to the frog and then frog to the middle without stopping your bow between the segments. Repeat the connection of these segments while keeping your bow hair on the string at the most bottom bit of your bow.
Placement Exercise Part 3:
Combine all four segments. Play with a continuous sound starting middle to tip, tip to middle, middle to frog, frog to middle, and then repeat! Keep your bow parallel to the bridge at all times, feeling your shapes change from rectangle to triangle to rectangle to triangles and back to rectangle.
I made a little video demonstrating all of this. Here it is:
Now that you’re using full, parallel bow strokes, try this on every string. THEN, try playing a scale. Maybe try a two octave G or A Major and/or Minor or Bb Major or B minor??? Side note: if you want/need some help with those scales, I have some freebie workbooks for you to download right now.
Storytime
Let’s give these exercises a brief pause for a story.
Classical violinists are often taught to utilize their entire bows as often as possible. The quip “Your parents purchased a bow: not half a bow. Use the whole thing!” is often chided at students. Full bows are often equated with ‘good tone’ in the classical realm. I remember when I had logged a few years into my fiddle transformation and was jamming during a rehearsal with Darol. He made some kind of comment that my sound was too big for the context of a fiddle duet while I was playing back up. I was confused because I had been thinking about my tone and trying to create ‘quality’. When I asked him what I should change, he said, “use less bow”. I had to recalibrate that recipe all over again- figuring out how to have a rich tone if I wasn’t using as much of my bow. Which leads me to…..
Placement Exercise Part 4:
This is essentially the same exercise as above, but instead of using your entire bow divided in quadrants, use the middle third of your bow. I like hanging out in the middle third - you have quick access to the rest of your bow when you need it, but you can remain agile and change strings efficiently within the middle third. Segment the same way in four pieces, just don’t reach your tip or your frog and keep your bow parallel to the bridge (this requires all the same elbow/wrist mechanisms).
Helpful tip: sometimes putting stickers on your bow can help you stay within a parameter. You can peel them off before you leave the house if you want. Or not-there’s no shame in practice.
The third and final ingredient, Speed!
Bow Speed is how quickly (or slowly) your bow is drawn across the string.
This ingredient/aspect of tone is often the hardest to explain or grasp since bow speed is NOT the same as rhythm or tempo. Lots of people don’t change this ingredient ever and have a very stale sound.
Similar to pressure, speed can affect volume. As a high school and first-year college student, I used bow speed to adjust my dynamics. I didn’t understand how to mix my ingredients. Unfortunately, if I used bow speed for a forte (strong) dynamic, I’d run out of bow. Since I was extremely focused on bow direction (see this post for a story on why I was terrified of misbowing a passage), I’d just move on to the next note. Whoa whoa whoa. This, of course, affected my rhythm. THE MOST CRUCIAL COMPONENT of music making! You can’t just move on to the next note if you run out of bow. You’ve got to make sure that bow lasts for the proper length of time (hence bow speed). Thankfully my violin professor/orchestra conductor realized that bow speed was contributing to my lack of rhythmic abilities, and explained the three ingredients to me in my next lesson. In that context, I needed to vary my dynamics with pressure instead of speed. (And. To. Subdivide!)
When I’m helping students vary their bow speed, I tell them to play one tune at a set tempo, but change how much bow they can use. This forces you to increase or decrease how quickly you’re opening and closing your bow arm. If you’re lost practicing with a metronome, here’s some help. Set your metronome around 100bpm and play Boil the Cabbage Down (remember you’re in cut time so that means there will be two clicks for every bar. If you’re counting, you’re counting to 4 and the clicks are on Beats 1 and 3.
Back to bow speed.
For your first pass of BCD with your metronome at 100, use the middle third of your bow. For your second, use your entire bow. For the third, use the upper half. Then try the lower half. Remember to keep your placement and pressure consistent right now.
You could keep using this exercise with your metronome at different tempos, and all your tunes!
You’ll notice that parts of the tune are just fine using ONE bow speed. But there are other phrases that you wish you could use just a little more or a little less bow than your exercise parameter dictated. THAT is when the magic starts to happen, and you start varying your bow speed while playing your tunes!
Time to start your own test kitchen.
Play around with different amounts of placement, pressure, and speed. Experiment with various combinations of each ingredient. You could start out with just open strings, and then move on to a melody you know really well- well enough that you don’t have to focus on your left hand and you can think about what your predetermined recipe calls for. Try setting your oven, oops, your metronome at various tempos as well.
A)
Placement: near the fingerboard
Pressure: lots of weight
Speed: medium amount of speed
B)
Placement: sounding point
Pressure: full weight of arm
Speed: slow speed
C)
Placement: sounding point
Pressure: full weight of arm
Speed: medium speed
D)
Placement: sounding point
Pressure: full weight of arm
Speed: fast speed
E)
Placement: sounding point
Pressure: not very much
Speed: fast speed
F)
Placement: so close to the bridge
Pressure: full weight of arm
Speed: slow speed
It could go on and on! What combinations have you figured out you love? Or strongly dislike? Do you have good names for the above recipes? Email [email protected] if you’ve got a clever one. Example E could possibly be called ‘Slow Burn’.
A few more ideas
I thought of two more ideas on tone production to share with you and then I’ve got to leave you already. Enough is enough.
It’s helpful to emulate the bowing styles of your favorite fiddlers and violinists. Study them. Notice where they are in their bows and how they use their upper arm, open their elbow, flex their wrists. Play in the mirror and watch your bow arm, but imagine it’s your favorite fiddler’s arm instead. Move your arm just like theirs. I found this incredibly helpful while I was trying to figure out Tommy Jarrell’s bowing pattern, play ‘cuts’ or bowed triplets like Natalie MacMaster and Hanneke Cassel, or chop like Darol. These lessons can directly affect your style and indirectly affect your tone. Bow direction makes a big difference, too, so pay attention to how your heroes are articulating their bowing choices. What am I talking about? Read this post on bow direction. Yes, I already linked it above. Bow Direction and Tone Production are not the same but yet very connected and it helps to have a grasp on both, so don’t miss out on that post.
I can’t quite decide how to categorize this last little odd nugget of tone production exercises. It’s definitely in the speed/pressure categories, and I’m leaning towards speed. But it’s challenging to articulate on paper/screen so I filmed a little video for you. Have you ever practiced these bow ticks? I had a summer teacher assign me entire full strokes of single ticks. Oy vey. Do what you will with this exercise, but know that finding the balance of patient strength and calmness in your bow leads to incredible tone control.
Alright, that’s it, folks! Thank you for reading and sharing my posts. If you found this helpful and inspiring, feel free to share with your favorite fiddlers, your fiddling friends who are not yet your favorite fiddlers, your students, your teachers, your grandma, etc. Sharing this site helps me tremendously and inspires me to keep writing more articles like this one. We can also be penpals IF you sign up for my regular emails that deliver links to new blog posts, books, courses, and whatever witty folk music scene banter I think you might appreciate. Let’s keep in touch!
Extra Extra, Read-All-About-It Newsletter Sign Up
Good luck on your tonal adventures, friends. I’m rooting for you.
xoL